I thought it was important to make a quick post about MTU settings as it pertains to HCX. MTU has been a dragon that I have been fighting my entire career. Previously, it had been in Storage Area Networks. But even more recently it is been spitting fire in my current role. While I’m not a network subject matter expert by trade, I’m still going to attempt an explanation of what it is and why it matters. I feel it’s necessary to preface this blog that there may be inaccuracies in the network explanation of MTU, but the solution of changing MTU sizes has solved issues for HCX migrations in many scenarios. Feel free to reach out and correct me on items I may be misrepresenting. Also, keep in mind that this is a topic geared towards Azure VMware Solution and will refer to Azure connectivity. If your cloud solution is in another hyper-scaler solution, some of these topics may or may not apply.
What is MTU?
I’m just going to repeat a Wikipedia explanation of MTU. Simply put by Wikipedia, MTU is “the size of the largest protocol data unit (PDU) that can be communicated in a single network layer transaction.” (https://en.wikipedia.org/wiki/Maximum_transmission_unit) I will note that IPv4 allows for fragmentation of the packets. But this is where I’m going to theorize where problems occur. A little fragmentation is ok, but there are services and applications that are highly chatty and network intensive which create random issues. In my storage days, I ran into a number of situations where MTU mismatches caused very poor performance on a SAN. Often times customers would think the SAN was the problem and not the network it relied on. After investigation, we would find the interfaces on both the hosts and the storage array were at 9000, but the switch interfaces were set at the default size of 1500. Storage traffic is a perfect example of where you will certainly see issues on MTU mismatches. This is some of the most network-intensive traffic you will see. Now, some more for Wikipedia:
“When the number of packets that must be fragmented or the number of fragments is great, fragmentation can cause unreasonable or unnecessary overhead. For example, various tunneling situations may exceed the MTU by very little as they add just a header’s worth of data. The addition is small, but each packet now has to be sent in two fragments, the second of which carries very little payload. The same amount of payload is being moved, but every intermediate router has to forward twice as many packets.”
https://en.wikipedia.org/wiki/Maximum_transmission_unit
What are Some Common Symptoms?
I’ve seen a wide variety of symptoms that adjusting the MTU size on the network profile seemed to resolve. Here are some of them:
- RDP session issues
- For example, perhaps you initiate a RDP session which gives you a login screen but after that only gives you a blank or black screen
- Perhaps you do get to log in, but the login takes 10 minutes
- AD issues
- Group policy doesn’t seem to populate and just spins
- Poor migrations speeds or failed migrations in HCX
- Perhaps you have a 10GbE ExR and iperf tests show poor bandwidth
- You experience migrations of large VM’s consistently fail
While these are some symptoms I have seen adjusting MTU sizes fix, MTU settings may not be your specific issue for your situation. So make sure you look at all factors.
How Can I Determine MTU Size?
There are a number of tools to determine this. First, I would say that if you do connect to AVS via VPN over the internet, you should start with 1350. I’ve seen networking vendor docs instruct VPNs to be set up with this size as a best practice. It’s possible that your network team just followed step-by-step and that is what you are set at. It wouldn’t hurt to ask the networking admin what the VPN configuration is, usually an output of it will show the MTU size.
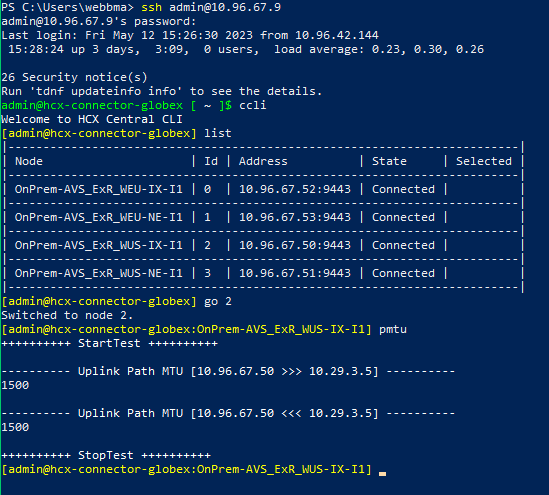
Now for the tools, we can use. HCX does have a pmtu tool that will check the path in both directions and give an output. This is only relevant if you have an active service mesh. You have to navigate to the specific node in the service mesh to run this command. Here is an example of a run in the lab.
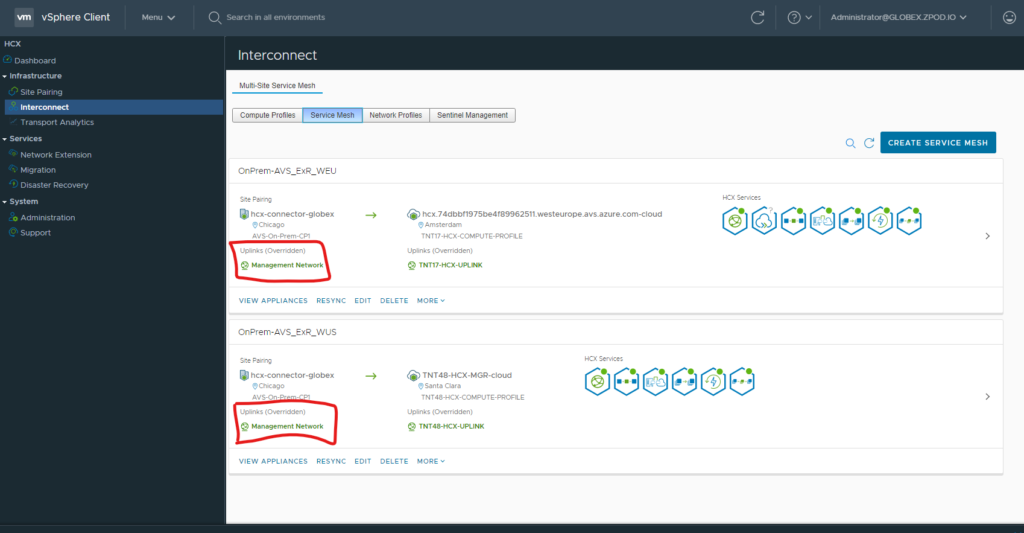
Now that we have some information, let us identify what our “uplink” network profile is for the service mesh. We can find this on the interconnect->service mesh and find the uplink network profile as seen below.
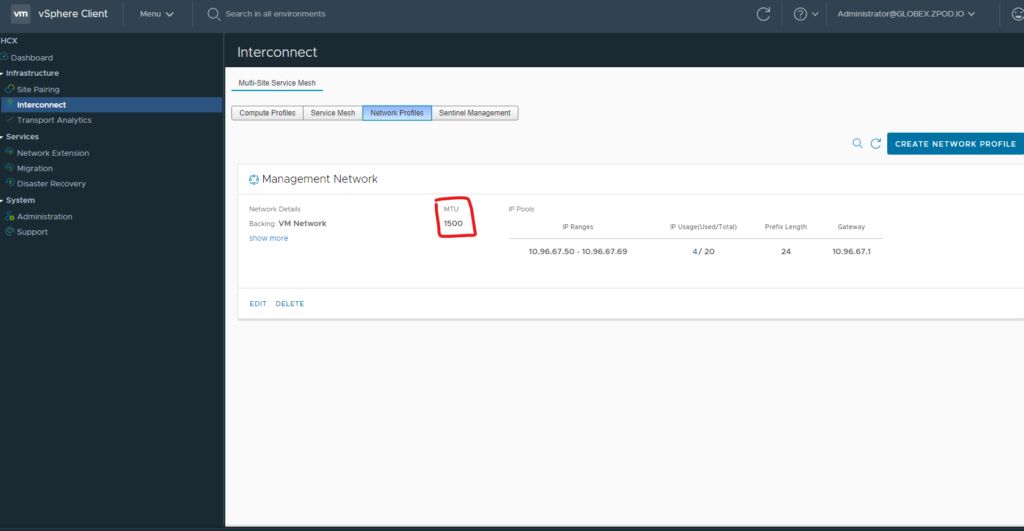
Now that we have identified a network profile used. Let’s see what its MTU setting is under the “Network Profiles” screen.
For those of you that do not have a service mesh, and are trying to be proactive (good for you!) You can also test MTU settings with a VM in both environments. Let’s look at Windows first and ping a virtual machines with the -f and -l flags to see where fragmentation is happening.
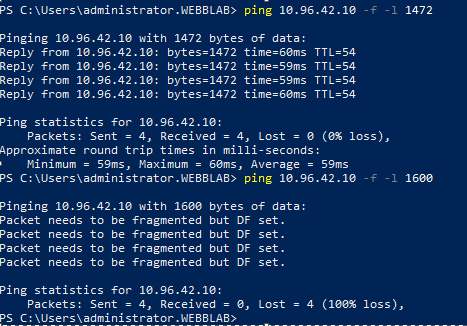
Notice that the packet size when doing ping in Windows does not include the entire encapsulation overhead. This is where PMTUD can be more helpful. This may exist for Windows, but I have not investigated that as of today. For other device commands to add a “do not fragment” switch, please refer to https://www.networkworld.com/article/2224654/mtu-size-issues.html
What to do About it?
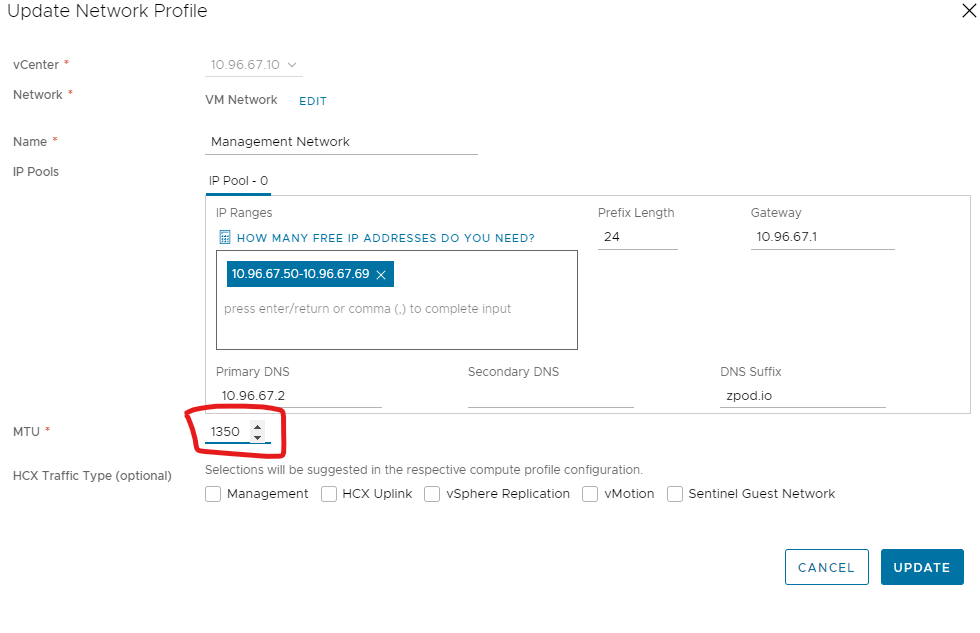
If we identify that the source and destination is smaller than what your network profile is configured to, its time to update our network profile and adjust our MTU setting. To do that, we edit our network profile and update our MTU setting as seen below.
Once you have saved this setting. You will have to resync the service mesh. Head over to the service mesh and click “resync.” A progress bar will pop up and after it is completed will acknowledge the MTU change. Click “Finish” and it will update your current appliances to the new MTU settings.
Wrap Up
In short, MTU misconfiguration can lead to spotty and transient issues. This is by far the most frustrating. If something is consistently not working, it tends to be easier to troubleshoot. Hopefully, this post will help someone on their HCX journey in the future!