Recently, I received a request from a customer to use a feature I had not used previously. The client was currently using the Identity Firewall within NSX-t on-prem to protect users from accessing specific sites within their network. Since Azure VMware Solution (AVS) is a managed service, a few features that work with NSX are not supported in NSX on AVS. This can be due to many reasons but is often because it would break automation for the service or it is difficult to provide at scale (some features like IDS/IPS simply need to be implemented and are high-priority roadmap items.) So does this feature work in AVS? Let’s find out!
Update: Since this blog post was posted there are two things to note. This feature does require an add on license. This is also true for IDS/IPS functionality and is in Private Preview in Azure!
What is the Identity Distributed Firewall?
One of VMware’s biggest benefits is the ecosystem that has taken 20+ years to build, acquire, and integrate. I’m not going to say that every VMware tool works perfectly together. However, I will say that the ecosystem in total solves significant challenges for customers. A great example of this is the Identity Firewall. This feature allows a user to use their Active Directory infrastructure to pass information about users and groups to NSX. With that information in NSX, you can create security groups around users and groups instead of just the specific machine. This is necessary when we look at things like Virtual Desktop Infrastructure (VDI.) Because VDI can be dynamic, it can be difficult to apply firewall rules to machines that may not be persistent. This could be impossible if you have multiple users from different parts of your organization logging into a single machine. But with data from Active Directory, you can now apply security groups to users to block or allow traffic to other infrastructure in your environment.
So how does this feature work and how do we configure it? Well, let’s first look at a high-level diagram of how the feature is supposed to work.
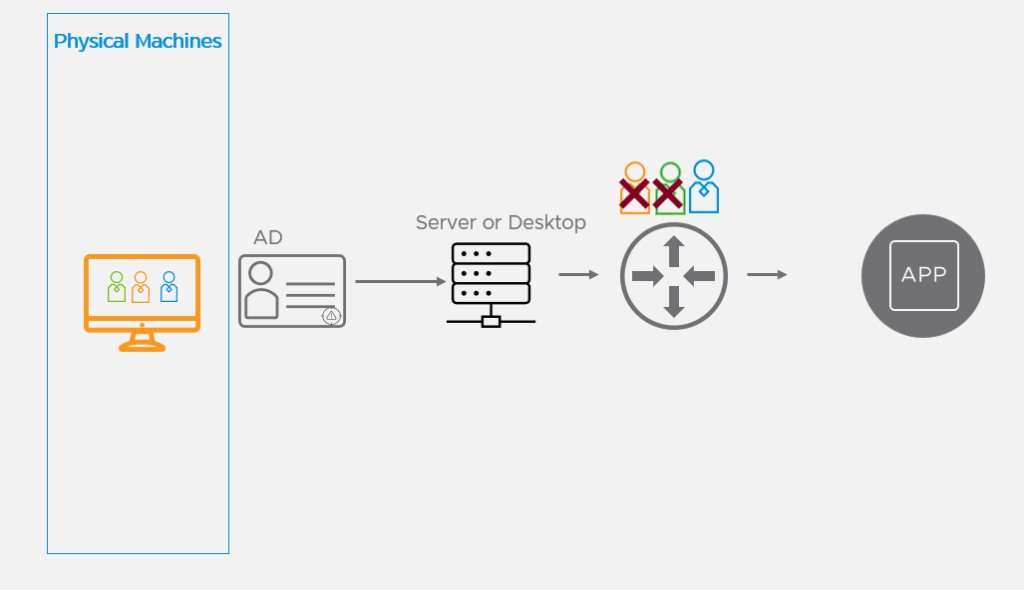
The concept is pretty simple. Use Active Directory credentials to enable or block access to specific applications on the network. So if Toby in HR logins to a system, Toby only has access to the HR tools, but not to the Finance tools.
Configuration
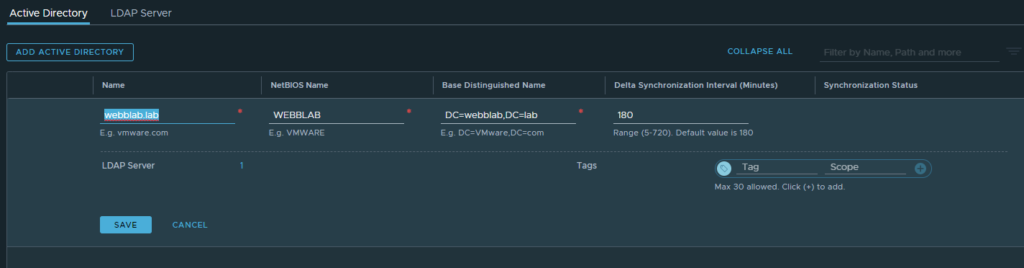
To get started, I’ll be demonstrating in a lab environment. We have a web server that is used to order pizza, but we want to block access to this web server to the HR department. This brutal and unreasonable punishment was passed down from the CEO. And as a lonely IT admin, I’m not going to ask questions, I’m just going to set it up. First, we need to configure Active Directory in NSX-t’s “Identity Firewall” section. This can be found under System->Identiy Firewall AD. Click on “add Active Directory.” Fill out the information for your AD system. Quick tip: in the “Base Name” section it wants the domain separated by your dots. So for my example, my domain is webblab.lab, so you would configure it with DC=webblab,DC=lab.
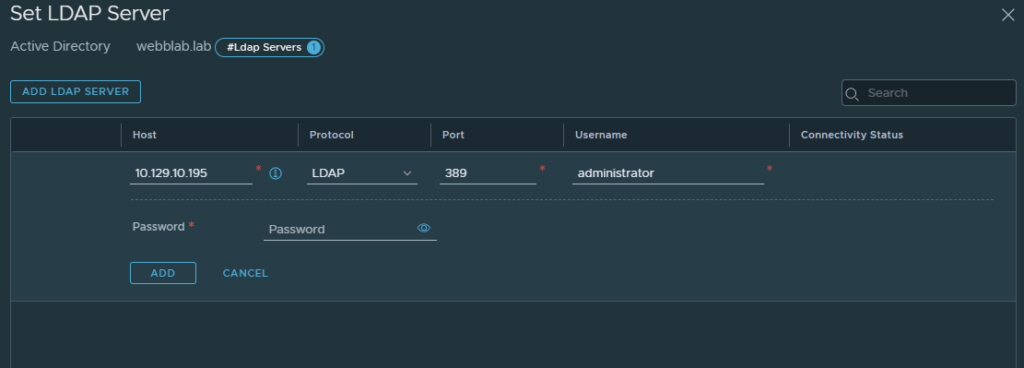
After filling the first screen out, click on “LDAP server” and configure your LDAP server here. You can click “Test Connection” to verify that LDAP can be reached. Once completed, click “save.”
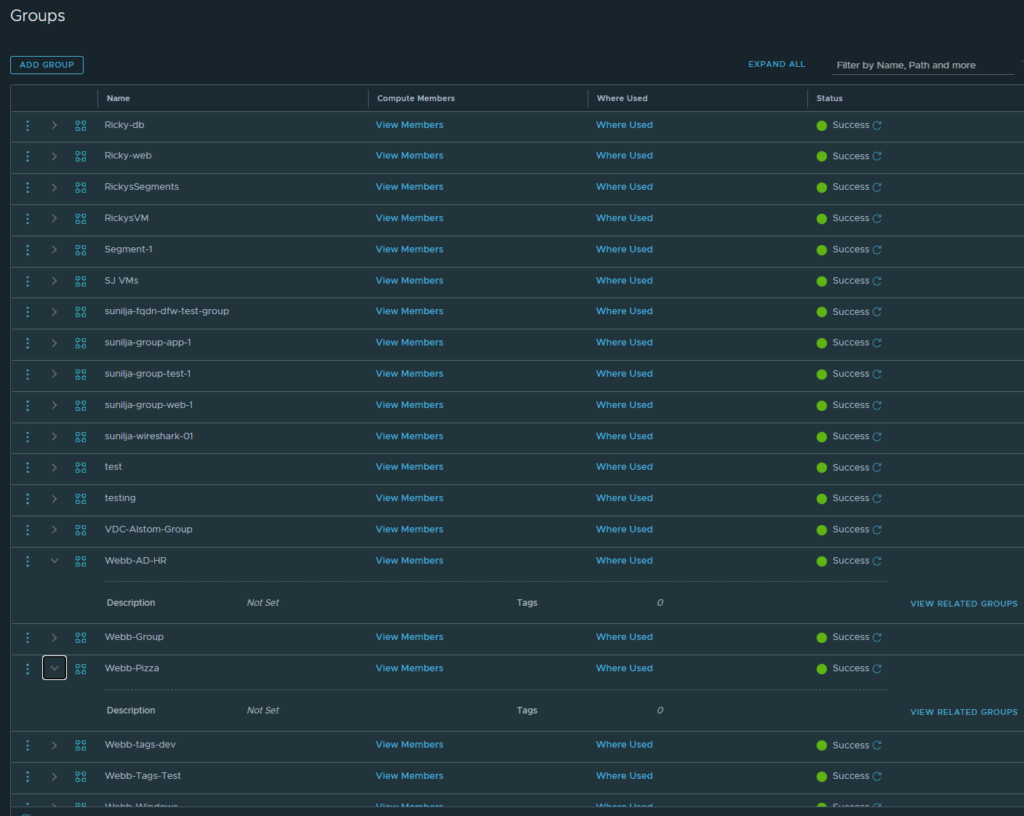
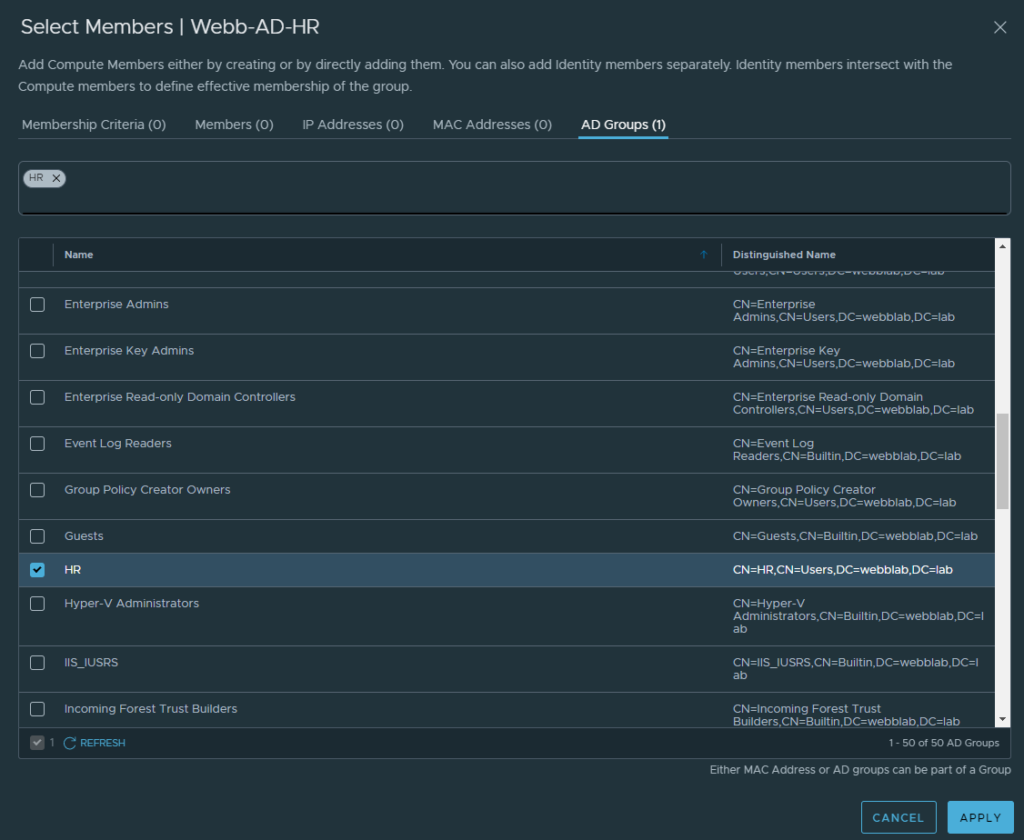
Now that we have the basics set up, it’s time to create a distributed firewall rule using users from Active Directory. First, let’s create a group with the users we want to build a firewall policy around. Go to Inventory->Groups, click “Add Group”, name the group, and then select “Set Members.” In this screen select the group you want to apply to. For our example, we are finding Toby from HR. Toby is in HR, so we will select the HR group. Click “apply.” Now we repeat the step for our pizza website, for this, we will just create a group based on the name of the VM that runs the website. A example of completed groups are as seen below for “Webb-AD-HR” and “Webb-Pizza”
Lets take a closer look at my HR group “select members” screen
Now that we have our groups configured, we can apply our policy. For this example, the policy will be simple. I will create a policy that drops all traffic from the HR group to the pizza web server.

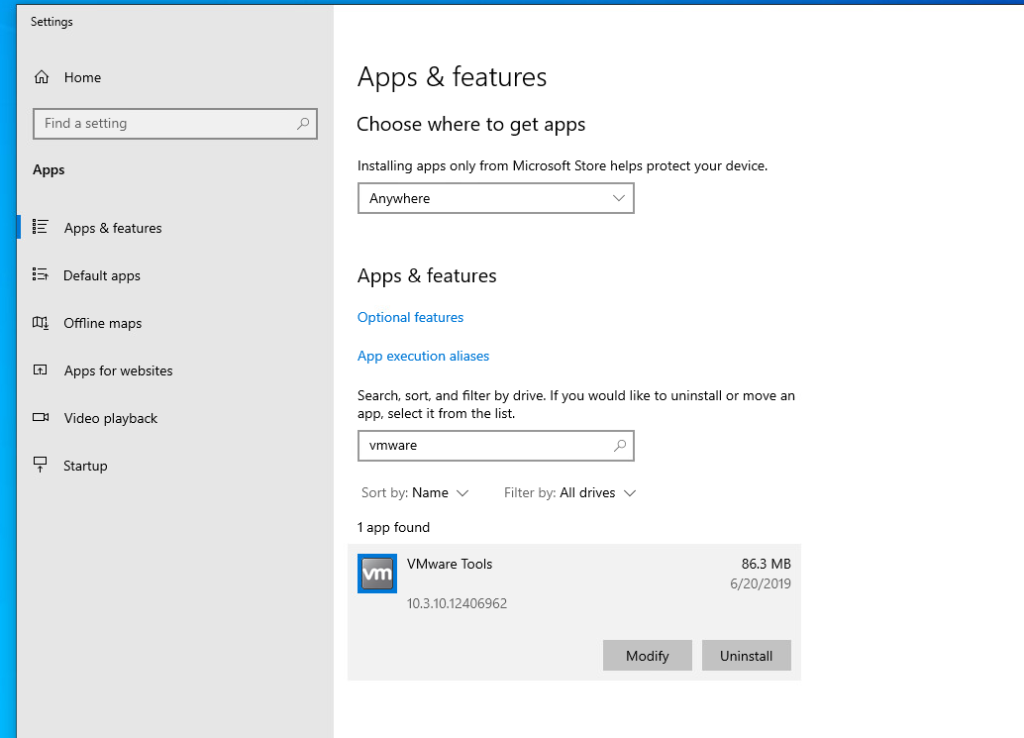
It’s important to note that you will need to make sure that guest introspection is enabled on the VM’s you want to protect with the IDFW. To verify if that is installed, you need to go into your VM or gold image where VMware tools is installed.
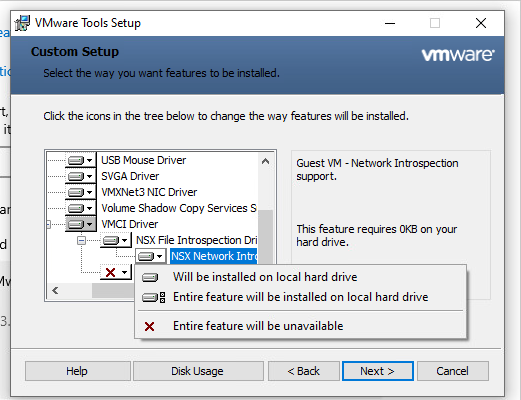
Now modify the install and ensure that introspection is selected, if not add the feature.
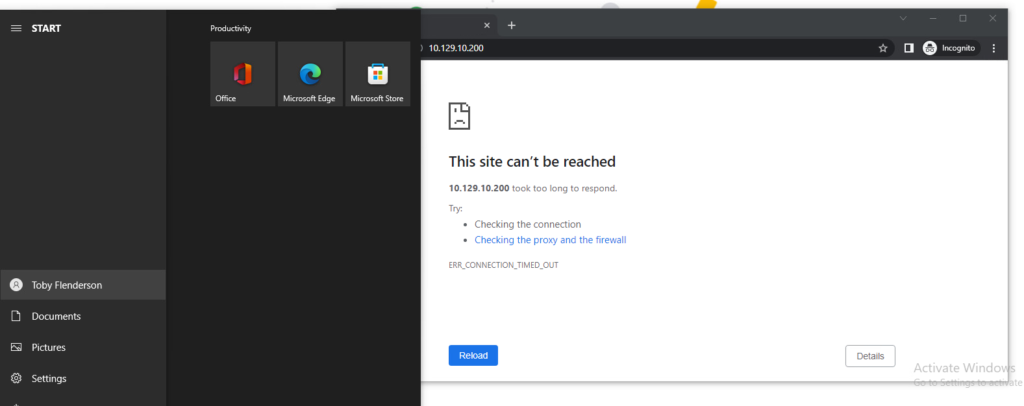
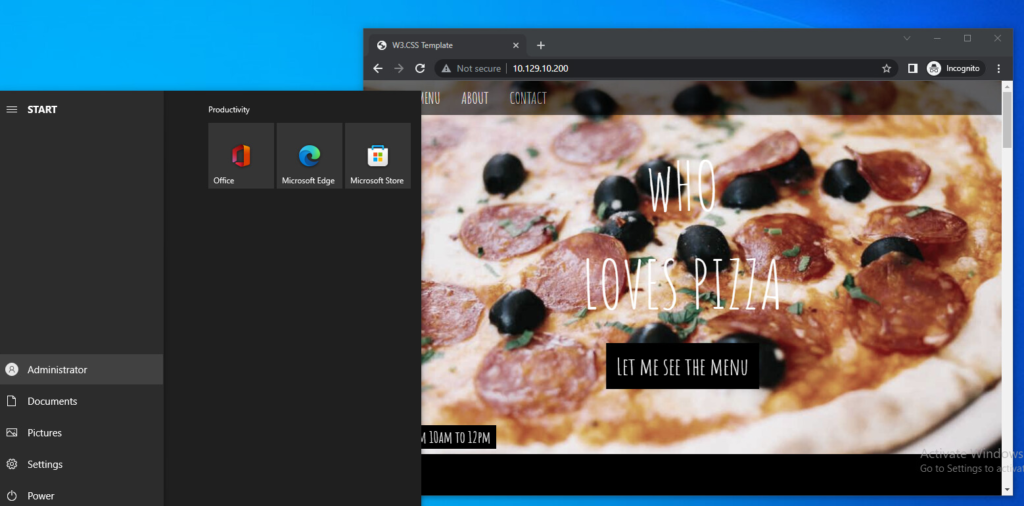
Now that we have applied our configuration, Let’s verify it will work! I have a windows 10 virtual machine that we will log into via the VMware Remote Console. Usually, your users will be logged in through a different method, but this will be a quick way to tell if the rules are working. While logged in as Toby, I can not reach the web server.
When logged in as Administrator, I can reach the web server.
Wrap Up!
NSX-t brings several security features to Azure VMware Solution customers. The best part is that NSX-t is included and the initial configuration is all done for you. This is a big value for customers that perhaps looked at NSX-t, but had to put it to the side for a variety of reasons. The Identity Firewall within NSX adds even tighter control to ensure your VDI infrastructure is protected!