This topic has been rattling around in my brain for a LONG time. A HCX Service Mesh one of the toughest subjects that I struggled with when I started as a Cloud Solutions Architect for the Azure VMware Solution. An HCX Service Mesh is a critical component in HCX setup process. It facilitates the creation of additional HCX appliances that connect to your vSphere infrastructure to provide migrations capabilities. An HCX Service Mesh can be as simple as a single Interconnect Appliance (IX) that connects to one network, or as complex as multiple appliances that connect to an array of networks to provide all the features that HCX can provide. In this blog post, we will explore how you prepare for a service mesh so that your setup will lay the foundation for migrations!
Why is it even called a Service Mesh?
I thought about this for a long time, I thought for sure I could come up with a simpler non-markety feeling term to describe what a Service Mesh accomplishes. It wasn’t until after I learned more, that I realized it is pretty aptly named. It’s called a service mesh because HCX is more like a Swiss army knife than a single-task application. There are features in HCX that are completely optional, and depending if you want to use those features determines what services are part of this mesh to your destination environment.
For example, if you want to use the Network Extension feature to create a layer 2 extension of your networks, that inevitably means you will be deploying a Network Extension appliance into the Service Mesh. That also will mean that that appliance will need network connectivity and access to a Virtual Distributed Switch (VDS) that houses the port groups you want to extend.
Another common example is if you want to use the HCX vMotion service, to vMotion VMs from one environment to another. This means that the IX appliance (often referred to as the Interconnect appliance) will be added into vCenter as a stand-alone host as part the service mesh creation. The IX will also need to connect to the vMotion network if the network it is deployed to does not have access to the vMotion network, your service mesh is the facilitator of all these connections and crucial to the HCX functionality. It is common to have vMotion on separate networks or firewalled off because vMotion historically has not been encrypted (Note, HCX vMotions are encrypted through an ipsec tunnel that is created for the service mesh.)
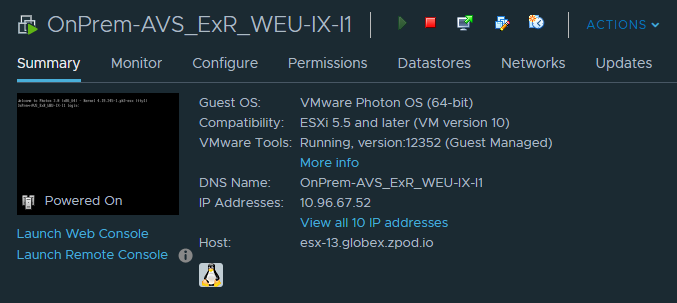
A note on the IX appliances. In a service mesh with the vMotion service enabled. HCX will have vCenter log in the IX appliance as a standalone ESXi host. This host will be in both ends of the service mesh, meaning both in source and destination environments. Do not try to deploy VM’s on these hosts, I have had customers not pay attention and accidently deploy a new VM to the hosts.
To drive this point home, I’m going to take a couple of examples of requirements for migrations and put them into practice. The idea behind this is to drive an understanding of what features affect what prerequisites and research you will need to do to successfully deploy your service mesh.
Scenario 1: Customer wants to migrate to AVS using HCX over a VPN connection.
The customer plans to re-IP workloads and use bulk migrations to do so. They do not intend to use vMotions or Network Extension. The customer only has a single vCenter with a single cluster of five nodes.
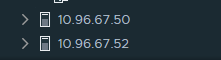
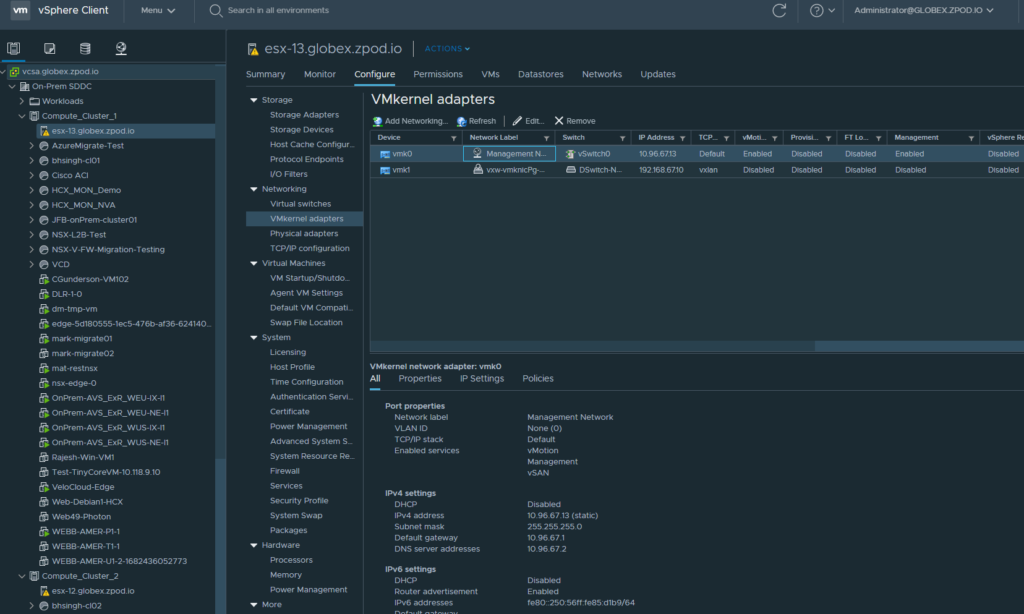
This will be the most simple of all examples. That is because we are only using a couple of features for HCX, namely bulk migrations. Since we are only looking at bulk migrations, HCX will deploy two appliances. This will be the IX appliance and the WAN Optimization appliance. The IX will need to have network connectivity to HCX, vCenter, and the ESXi Management VMkernal interfaces. If you are not sure what network the VMK’s are on, you can easily identify those networks in the host-level view->Configure->VMkernal adapters. In this screen, identify the VMK that has management service enabled. Just for clarity, here is the screen in the image below.
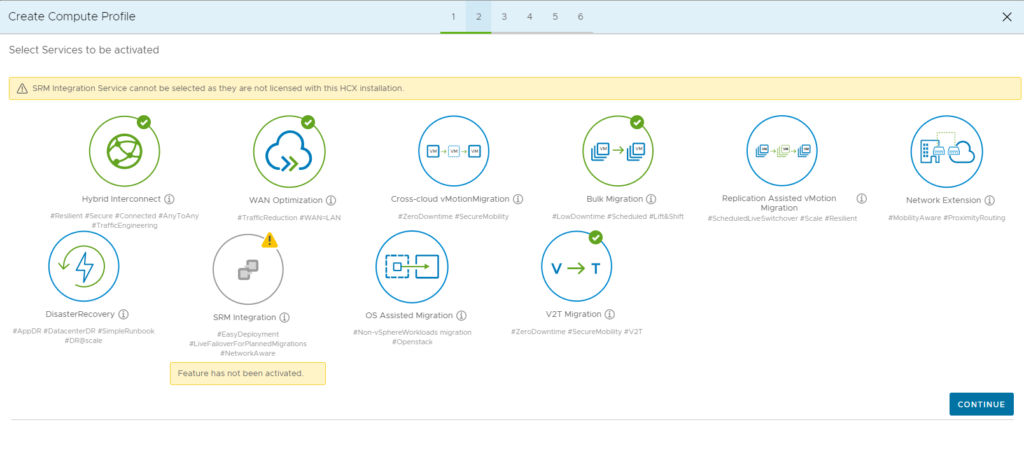
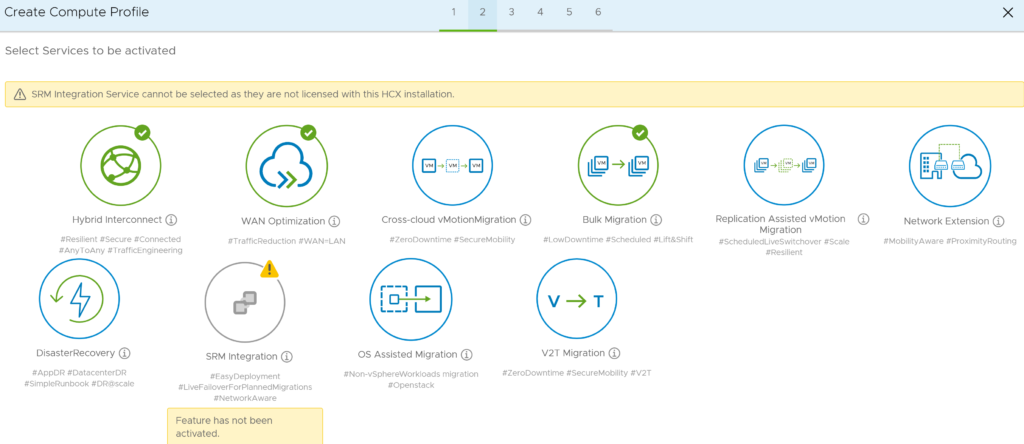
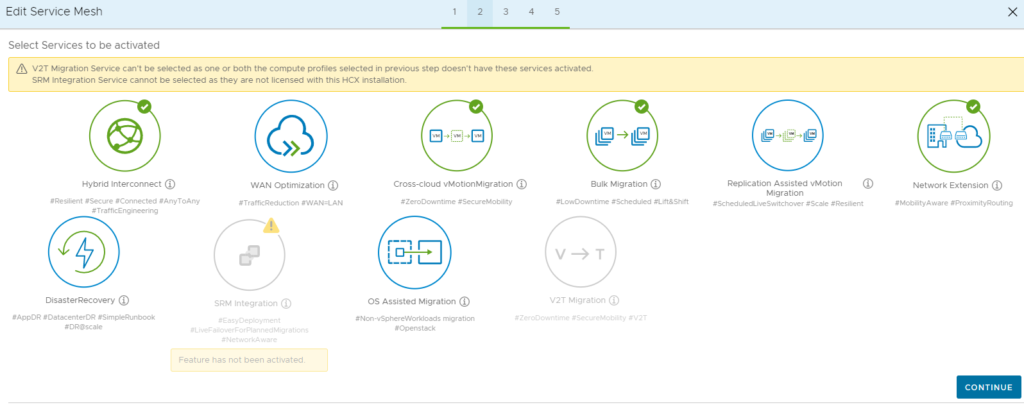
So simply put, we will start by going to HCX and clicking on “Interconnect,” give it a name, and our next screen will look like the image below. Here we will only select the Hybrid Interconnect, WAN Optimization, and Bulk Migration.
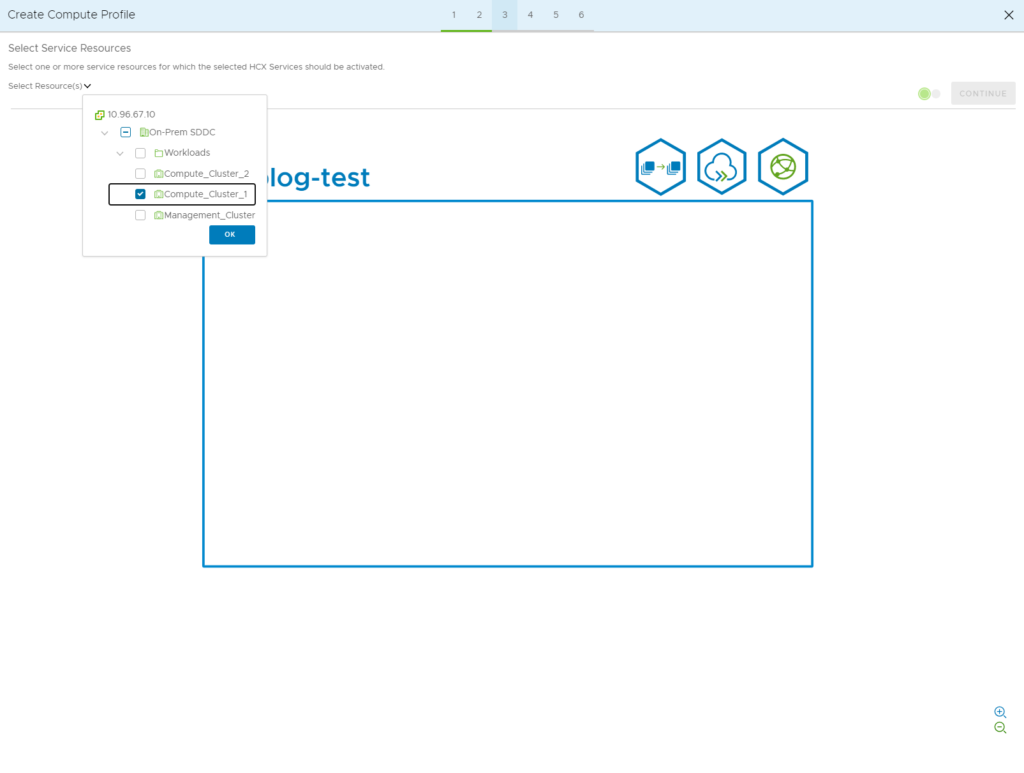
Our next screen is asking us “Where are the VM’s you would like to migrate.” In this screen, we have selected just one cluster which houses the VM’s we want to migrate.
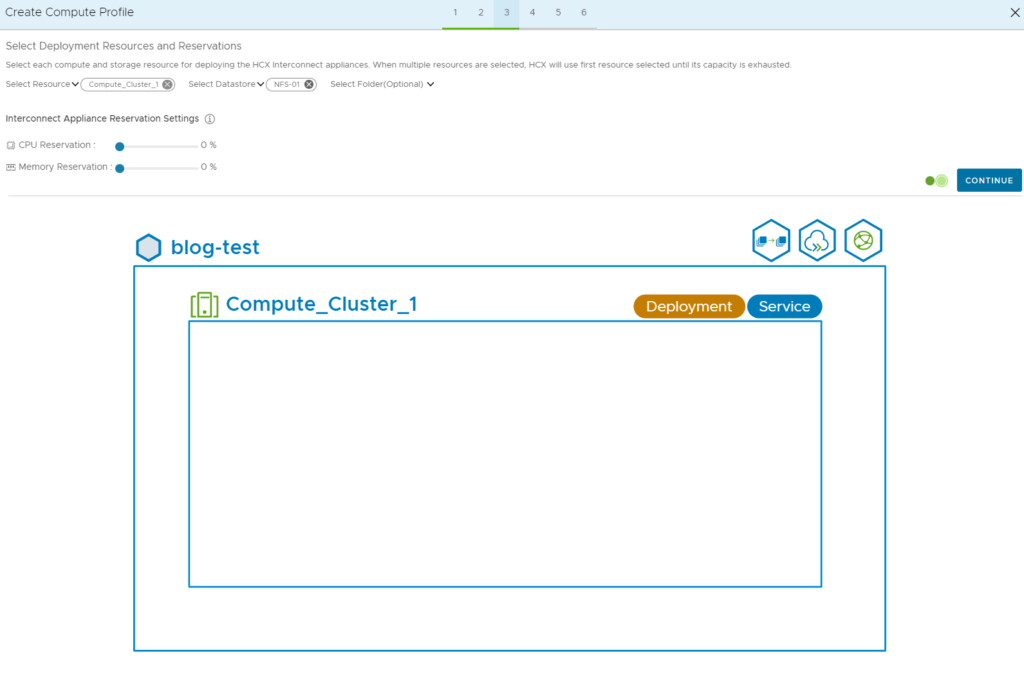
Our next screen is the “Deployment Resources and Reservations.” This screen is asking us where we want HCX to deploy our Service Mesh appliances. In this scenario, we will only have two appliances and we will select the same cluster we are migrating. We will not select any reservations because this is not a very “hot” environment that requires reservations.
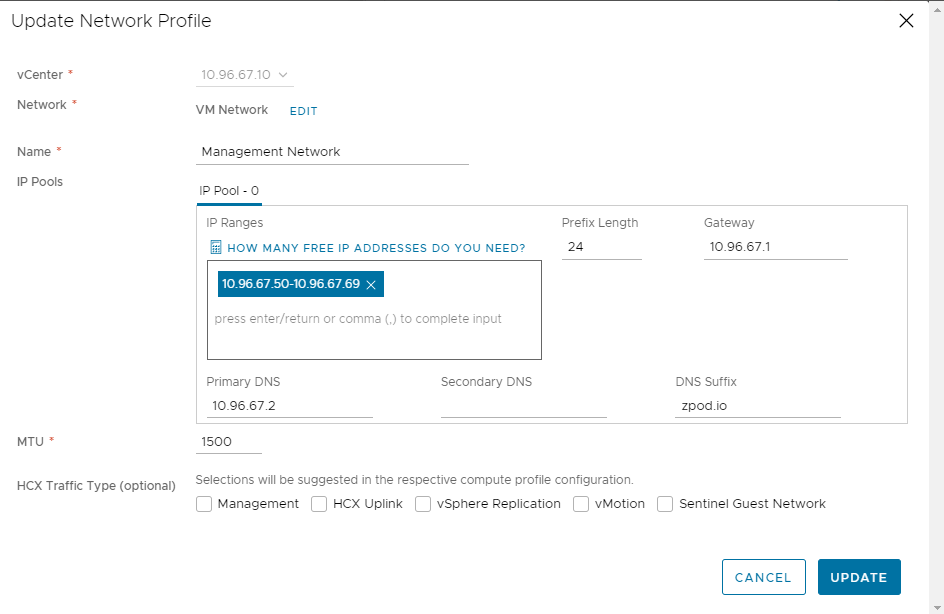
Our next screen is asking for a network that the IX will use to communicate to your vSphere infrastructure. This network does not need to be the same as vCenter or ESXi, but it does need to be able to communicate with those systems. Typically, putting these appliances in the network where vCenter sits makes things easier. Thats because we know vCenter can talk to the ESXi hosts to manage them, and sitting on the same network as vCenter ensure connectivity there unless your have a micro-segmented environment. We will click “Create new network profile” and fill out the following screen.
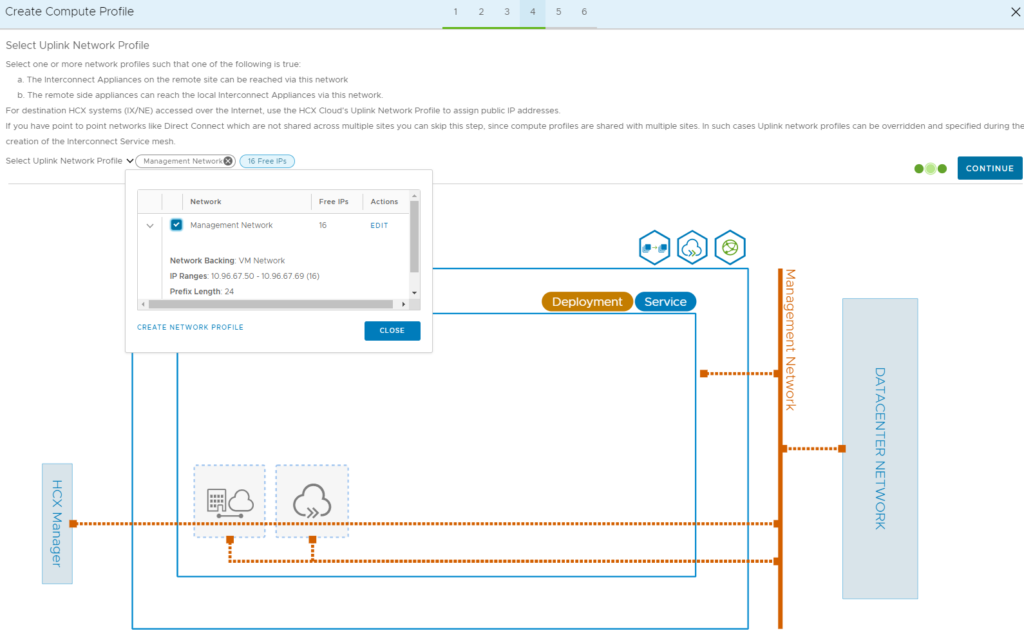
The next screen is our “uplink” screen. If the network you added to the network profile has access to the destination AVS environment and firewalls allow UDP 4500 traffic, then you can just select the network profile that you already created. If it does not have network connectivity to AVS, then you will need to add a new network profile so that the IX can sit in a network that would have that outbound connectivity. In our example, the management network profile we created has this access and will be selected.
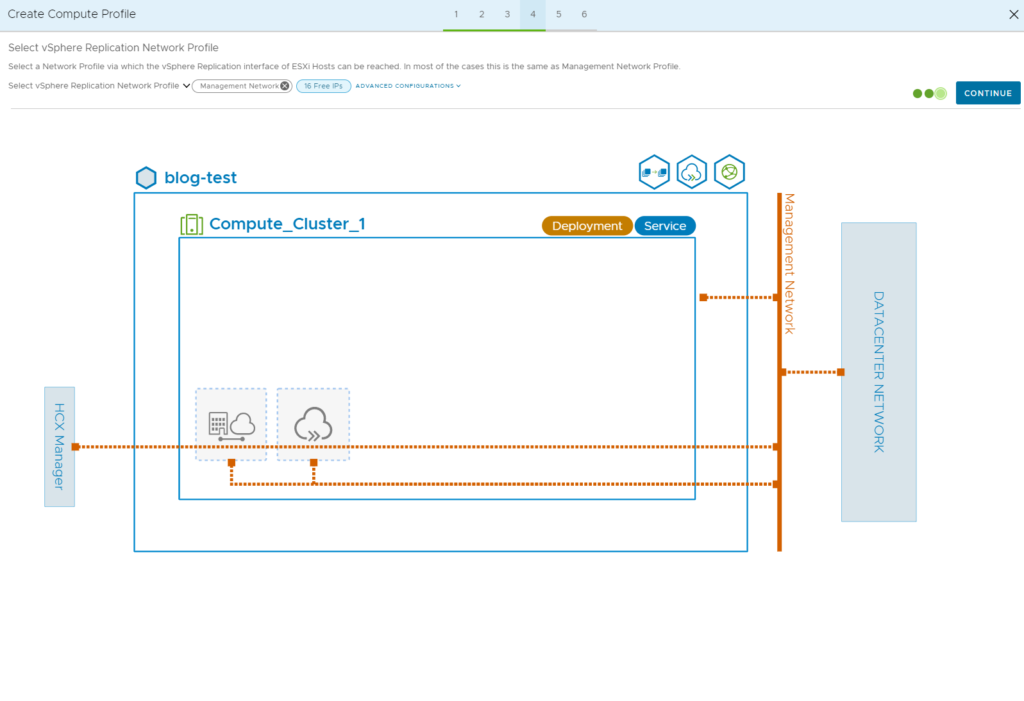
Our next screen asks where we can access the replication network. If you have not made a specific VMkernel adapter with vSphere replication traffic service enabled, select the same network profile we have been using. vSphere will use the management VMkernel if no specified VMK has been configured.
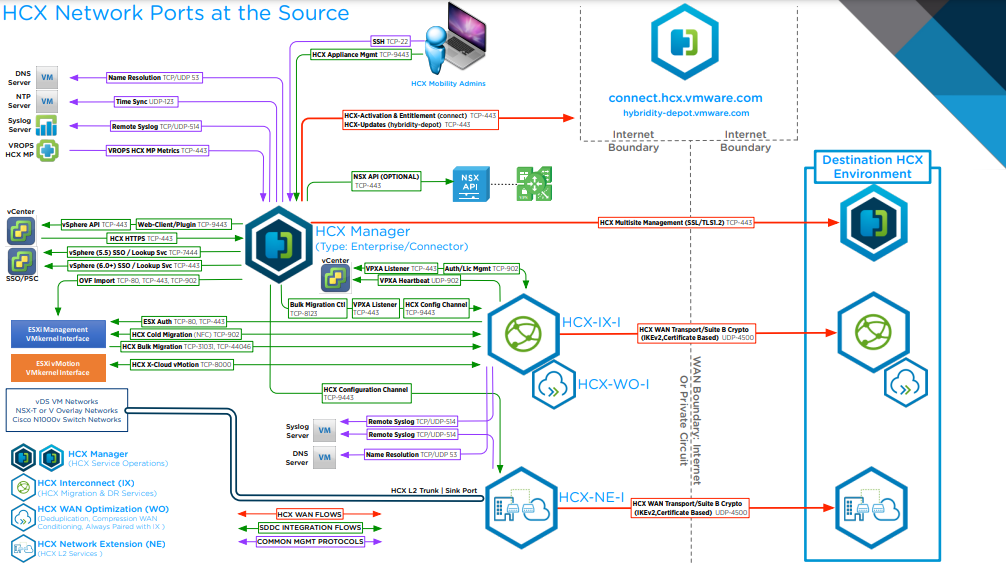
The next screen will generate the ports we will use in this service mesh. This is good to copy and save just in case we run into firewall issues.
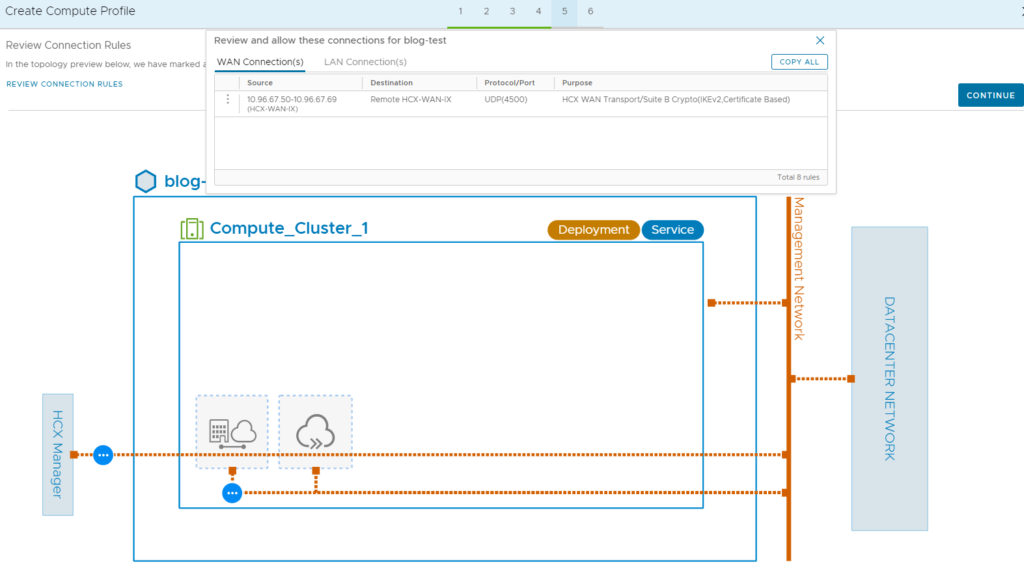
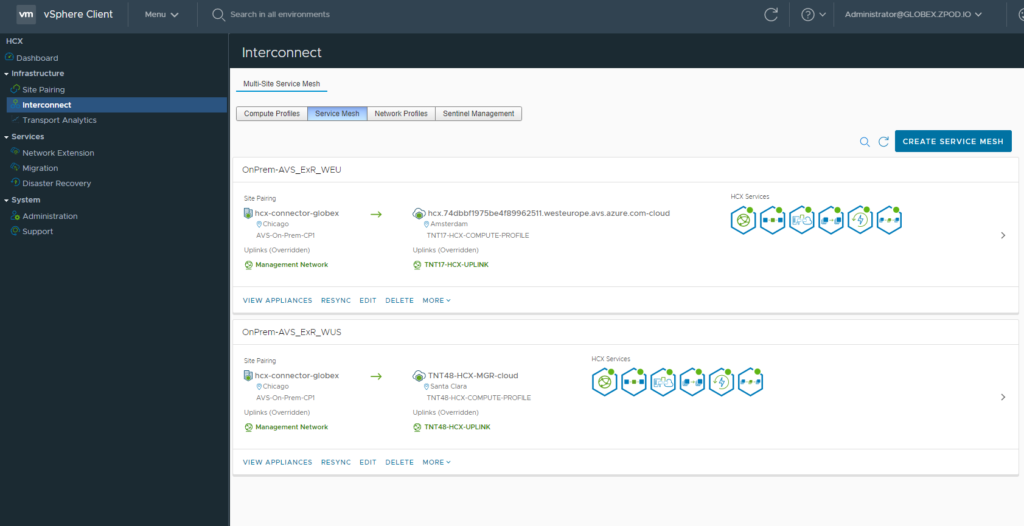
That completes our compute profile! Our next screen asks us if we are finished and want to complete the wizard. That means we need to click on the Service Mesh section in the blade next to the Compute Profile. Click on “Create Service Mesh.” We are going to essentially click “next” through every screen except for where we need to name our interconnect. Once we complete this section, we are done and HCX starts creating its service mesh. You will know you are in a good spot when you see all the appliances in a service mesh are green as seen below.
Scenario 2: Customer would like to maintain IP addresses and use vMotions
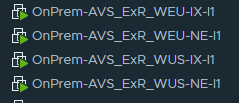
In this scenario, the customer has a single VDS with about 10 networks they would like to extend concurrently. They would like to have no downtime so they want to use vMotions. This means that we will be looking at at least 4 total Service Mesh appliances. We will have the IX and WO like in the previous example, but we will also need not just 1 but 2 Network Extension (NE) appliances. This is because each NE can support 8 active network extensions.
Let us start with our Compute Profile creation again and start that wizard by clicking on “Create Compute Profile.” Our Compute Profile naming and resource allocations are going to be the same. I’m going to focus on the new screens that we will get because we chose these features. But first lets look at what the features screen will look like when we enable these capabilities.
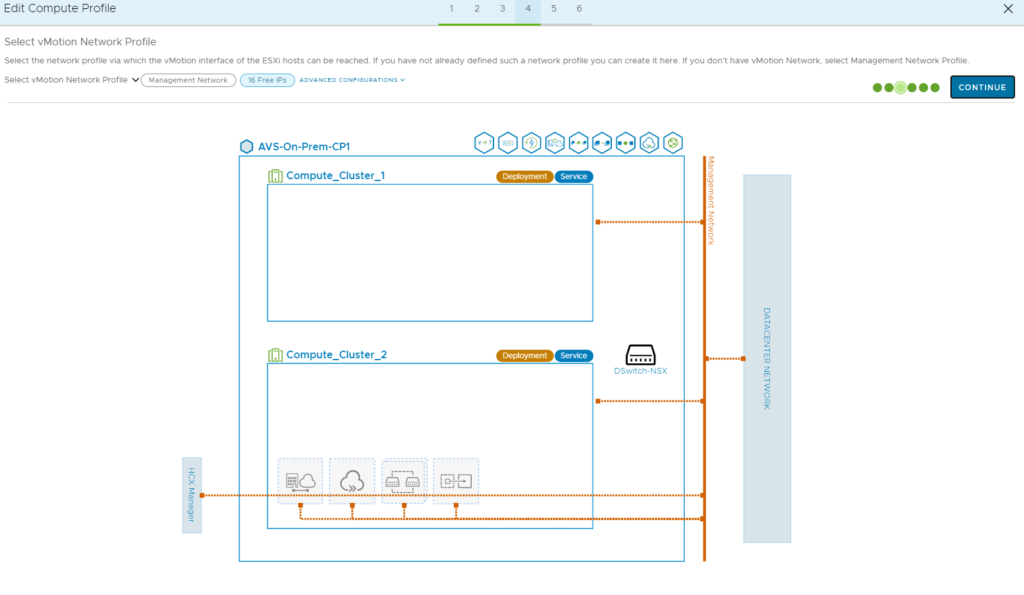
Since we selected the vMotion feature, there will be a page that asks how HCX will communicate with the vMotion network. Typically, and as stated before, vMotion is on a non-routable network. Similar to a Storage Area Network (SAN.) So we will need to create a new network profile to specify an IP range or IP address in the vMotion network.
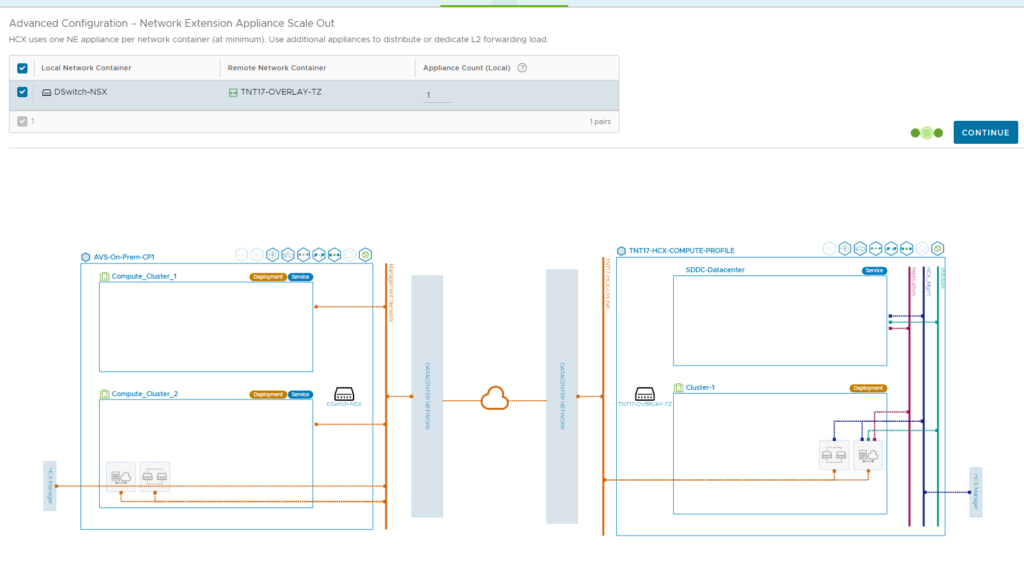
The rest of the compute profile information will be the same. When we start our Service Mesh creation, all the screens will be similar with the exception of our Network Extension page. Here we will select our “network container” which is our VDS that houses the port groups we want to extend. We determine the number of NEs in this screen. Reasons to add more would be due to performance, number of extensions, and if you want to deploy NE’s in high availability.
That completes all the new screens, the rest of the workflow will end in a service mesh with these features enabled. If you have any issues upon completion, make sure to review the ports diagram closely to see if there is a firewall blocking either ports across to the destination or ports within your environment.
Wrap Up
Service Mesh creation in HCX is the most complicated part of configuration. That’s primarily because it requires us to think about how the current environment is configured, take that information, and line it up with HCX so that it can communicate to the proper networks to perform migrations, based off your requirements. With a little bit of planning and research, you should be able to configure your service mesh correctly and set off on you migration journey!