**Update Notes: A number of items have changed where some of this info is now out of date. I would recommend reading through Microsoft docs here and here for simple integrated ways to update your storage policies. The following post still has some relevancy. It will cover the basics and how you can use the vCenter API, so I’ve decided to leave it up!**
Azure VMware Solution (AVS) is one of the fastest-growing and exciting products in azure (yes, I know, I may be a little biased.) Many customers are finding value in bringing their current knowledge and training into azure and getting access to many new features. On top of that, AVS is a managed service, freeing up IT resources to focus on the business and push for more innovation. However, with a managed service comes change. The level of access you get in vCenter is different than your on-premises datacenter vCenter. So today, we are going to talk about how the “cloudadmin” role works, specifically around vSAN administration.
vSAN in Azure VMware Solution
Azure VMware Solution is a VMware-based Software-Defined Datacenter in Azure’s cloud. It’s based on vSphere, vCenter, vSAN, NSX-t, and HCX. vSAN is the primary datastore that you house your VM’s data on. vSAN is a Hyper-Converged Infrastructure model that uses local drives in each host of the cluster and spreads your data out so that you have enterprise-class storage performance and availability. One of the biggest advantages of vSAN is that it simplifies storage management. vSAN does this through Storage Based Policy Management (SPBM for short.)
This post will not be a thorough review of SPBM and its capabilities. If you would like to read more about that, you can review it on core.vmware.com which is great technical marketing material, or review my blog post here about capacity management. Keep in mind, things do change with a managed service offering. Most documentation assumes you are treating it like an on-prem solution. Let’s touch on some of the high-level differences you should think about when reading up on vSAN.
- Dynamic provisioning: When considering how many hosts you need, you usually need to consider space for rebuilding. This is because you typically don’t anticipate having extra nodes sitting around waiting to be used. In a solution like AVS, Microsoft is maintaining many nodes that can be added to a cluster anytime. This scaling and automation capability can be leveraged for growth on demand, but is also important when you think of maintenance operations like rotating out hosts that have issues. So the same reason why you may actually buy 4 hosts on-prem, may lead you to buy just 3 in AVS. Because you know if something goes wrong with a host, Microsoft will rotate out that host and replace it with a new one.
- Storage Policy Access: As of writing this, today you cannot make new storage policies. These policies are pre-created for you in the AVS cluster. I’m not going to describe these policies outside of their name, because the name pretty much tells you what settings they have. The policies you get in an AVS cluster is: vSAN Default Storage Policy, RAID-1 FTT-1, RAID-1 FTT-2, RAID-1 FTT-3, RAID-5 FTT-1, RAID-6 FTT-2. There are more than what I just mentioned, but those are the primary ones. The biggest call out is that the vSAN Default Storage Policy is thick provisioned and is the datastore default storage policy. We will talk about this in more detail later.
You can change the datastore default policy on your 2nd cluster within an Azure Private Cloud Instance and up, but you can not change the first one.**Update: You should now be able to update the default storage policy for cluster-1**
How to Change Storage Policies in AVS
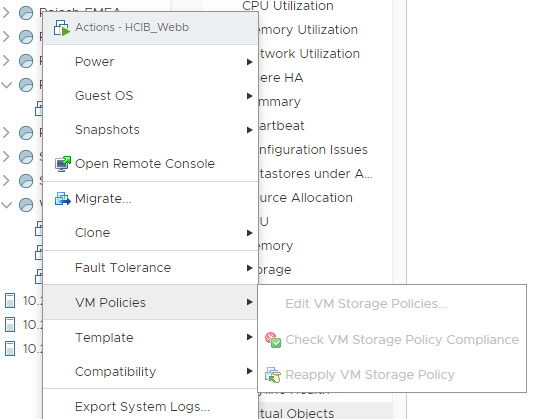
Now that we know a little about what is available to us in the AVS cluster. Let’s talk about how we can manage those VM’s policies individually, as well as at a scale. We know what the datastore default is for the AVS cluster, which is the vSAN Default Storage Policy. Most people will not want to use a thick provisioned storage policy, because it’s simply not space-efficient. So you will likely change to one of the other options. Which one you choose will depend on the number of hosts you have in your cluster, and your capacity and performance need (more on this in the previous articles linked above, not going to go into detail on those considerations here.) To change the storage policy on a VM is pretty easy, it is probably different if you are used to doing this in an on-prem cluster. Notice below how we can not choose the VM policies options because our “cloudadmin” accounts do not have those rights.
However, if we go into the VM settings. We can select the VMDK’s and have the storage policy available to us here.
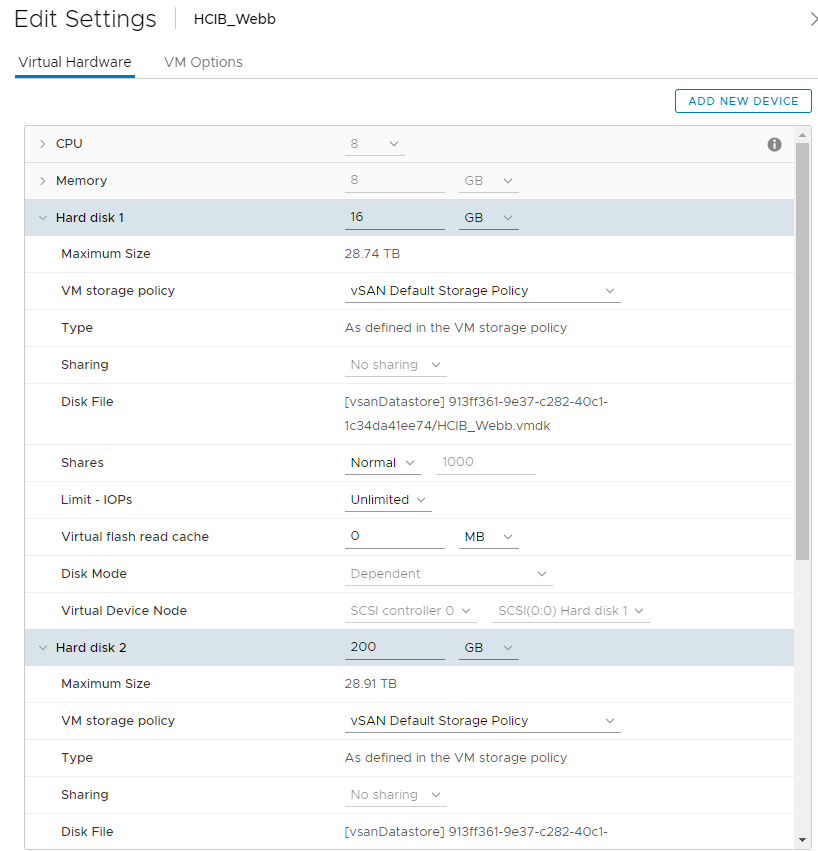
This is great if we are being very specific with policies. This allows us to apply a RAID 1 policy to say a logging drive that may be small capacity but high I/O. Or apply a RAID 6 policy to a file server that is low I/O but consumes a lot of space. However, if we wanted to apply a single policy to an entire set of VM’s, there is no way (that I could find anyway) in the UI to make this bulk change. So to avoid operation “repetitive-click-ops” we are going to use PowerCLI to make bulk changes. If this is your first time using PowerCLI, you can easily install it by using this method in powershell.
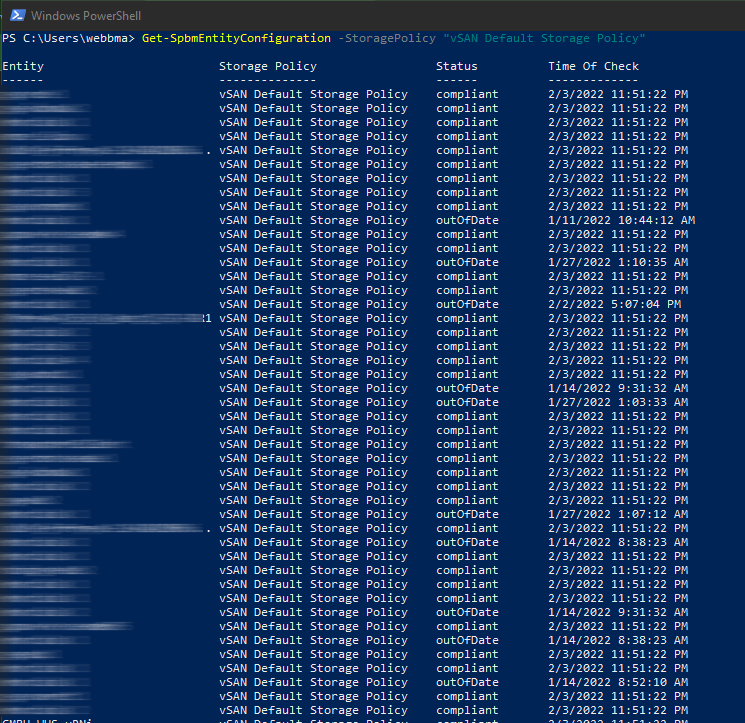
We are goin to use the Get-SPBMEntityConfiguration and Set-SPBMEntityConfiguration commands to complete our tasks. Lets first look at doing this across an entire set of VM’s that are tied to a storage policy. Below I’m using Get-SPBMEntityConfiguration which is returning all objects tied to the vSAN Default Storage Policy.
I could pipe this to a “set” which would change all of these VM’s listed by issuing something like…
Get-SpbmEntityConfiguration -StoragePolicy "vSAN Default Storage Policy" | Set-SpbmEntityConfiguration -StoragePolicy "RAID-1 FTT-1"
This would would effectively change all the objects to the “RAID-1 FTT-1” policy. But what i’ll do here is just change my specific VM’s.
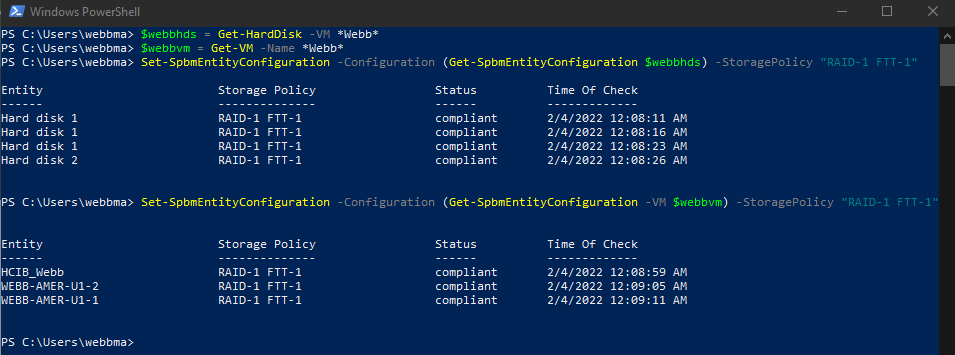
I big call out here is that you have to specify hard disks. If you simply run the VM name, it will only change the VM objects like the swap and home objects.
Wrap Up
AVS is a fast growing service in Azure because it offers a lot of existing VMware customers. When you look at adopting this new managed SDDC model, its important to learn about some of the differences the “cloudadmin” role may affect day to day operations. Be sure to check out my script on github here, keep in mind that these are for reference only and any script being used in a production environment should be thoroughly tested!