Any time you are looking to add to or replace infrastructure, one of the most essential things to obtain is quality performance data. Early on in my career, obtaining this information was a challenge. It wasn’t uncommon to skip obtaining this data and make assumptions based on existing infrastructure or making decisions based on “business as usual.” Fortunately, today, there are free and easy to use tools to quickly obtain this data to analyze and make informed decisions based on your organization’s needs. This post will not focus on the “why” of Live Optics (you can read my blog on that here) We will simply focus on the “how.”
Obtaining the Collector
We are going to focus on the .NET windows collector, which is the most common way this tool is ran. There are two ways you can obtain the collector. The first way would be to download the collector from a link that a pre-sales systems engineer sends to you. Multiple vendors have standardized on Live Optics for secure and accurate data collection. The email you would receive would look similar to the one below.

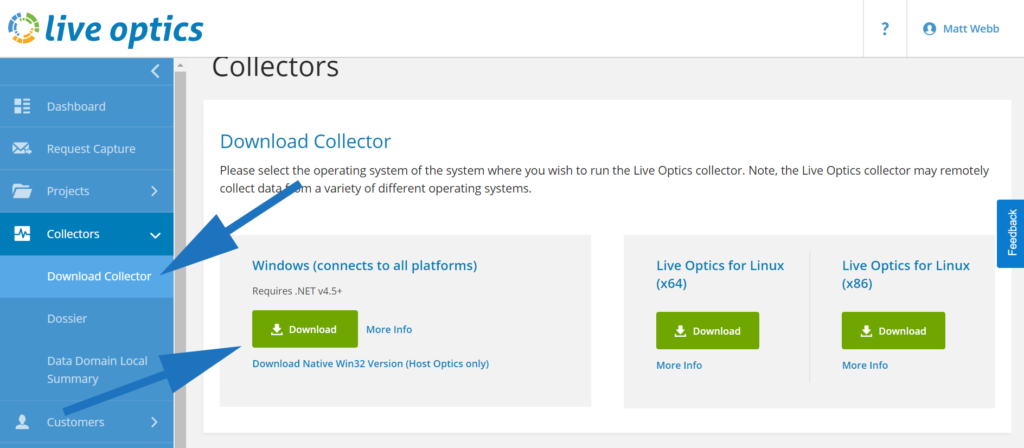
The second way you can download the collector is to make an account on https://www.liveoptics.com. When you make your account, you can sign in and download the collector as seen below.
Running the Collector
Before we run the collector, a quick note on how this tool collects data. The collector is a remote application that will monitor systems for up to 7 days. You could run the collector on a management station or a virtual machine in your environment. The lightweight tool does not install on disk but is installed in RAM. So once you log off, the application is gone. The most important part is that the collector maintains network connectivity to the systems its recording to report data. Now that we have the collector, we need to extract the files and open the LiveOpticsDotNet4_5.exe file. Note the actual name will change as different versions are released. Also, the EULA and security briefs are included in the extracted files for your review.
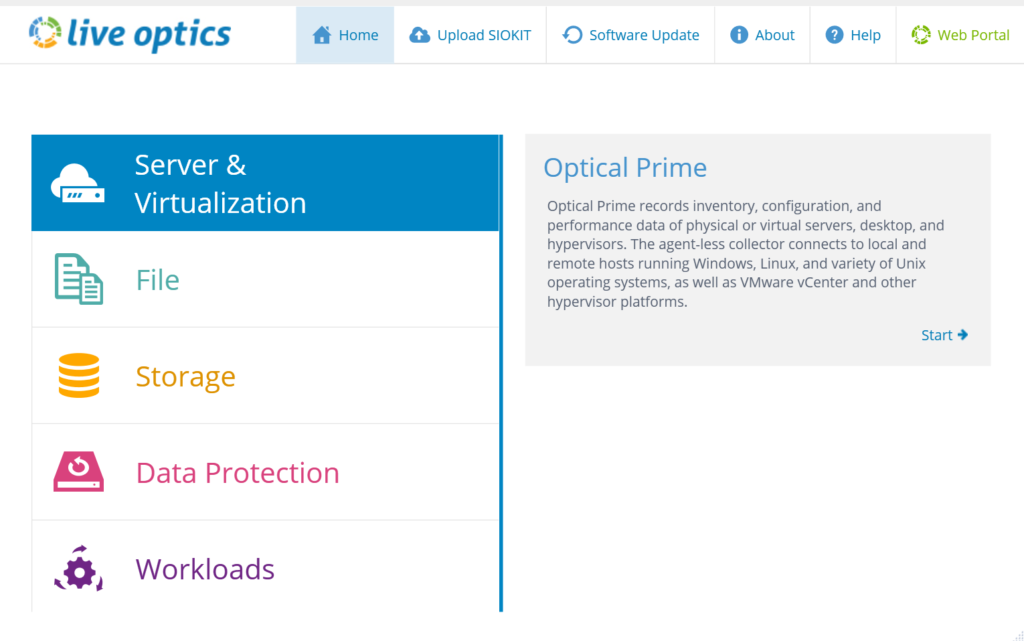
Now we are ready to collect some data! The first 3 screens are going to be the EULA, collector software update check, and your contact information. We are going to use Optical Prime to monitor a set of my lab systems. I have a mix of Linux, Windows, and ESXi systems. Let’s start by selecting “Optical Prime.”
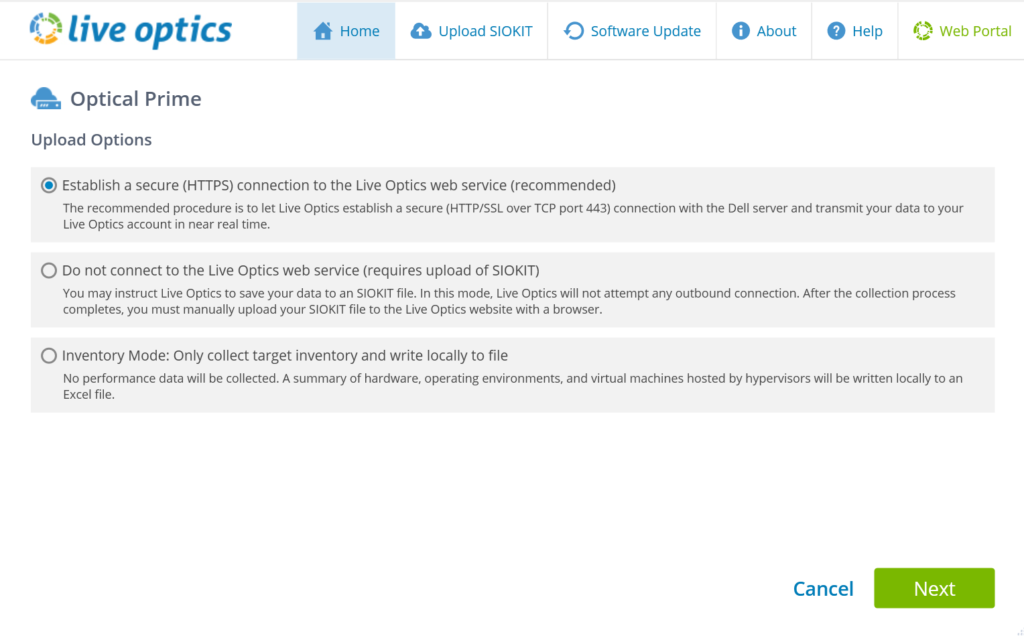
Next, we are going to select how this data gets to the Live Optics web application. For simplicity, I recommend selecting the “recommended” option where the data is automatically sent to the Live Optics website over HTTP/SSL. If this is a “dark site” you can run the “Do not connect to Live Optics web service.” This will require the transfer of the .SIOKIT file to the website to get the results.
Now we are ready to add systems. I’m going to start by adding a VMware vCenter system that has a collection of hosts in its inventory. I will select “Add Remote Server” and choose “Connect to a VMware vCenter Server (including vSAN or HCI deployments.)
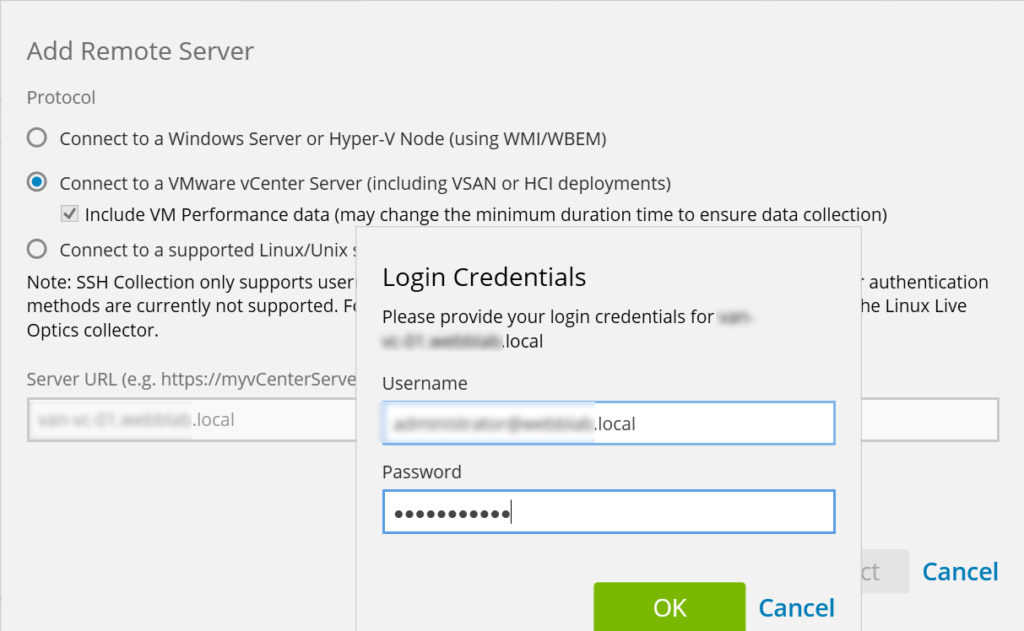
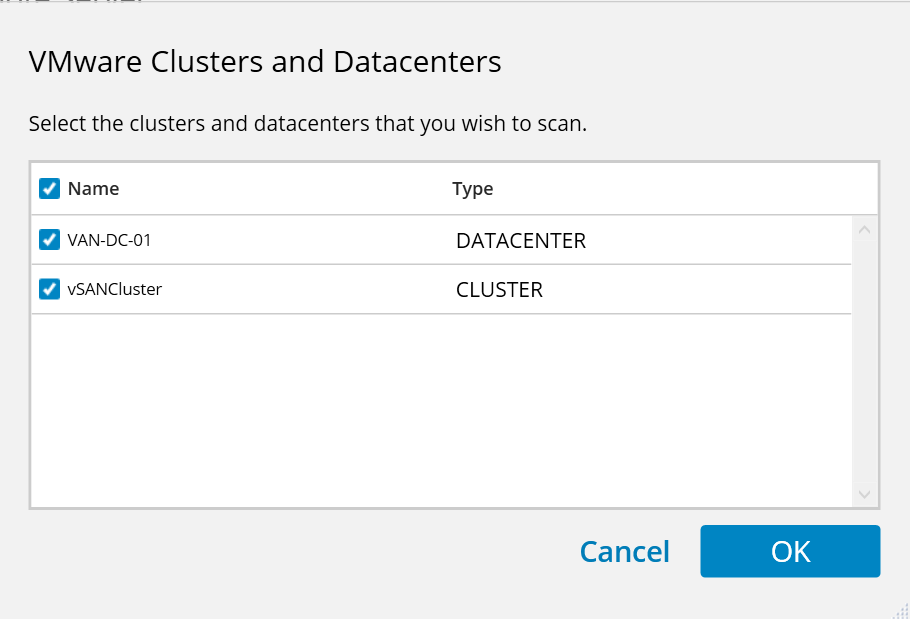
Once you type your credentials, Live Optics will pull the inventory of the vCenter server. I recommend going ahead and record all of the systems in your inventory. This is because Live Optics is a dynamic application that allows us to remove systems when you are analyzing the data.
How to Bulk Add Systems
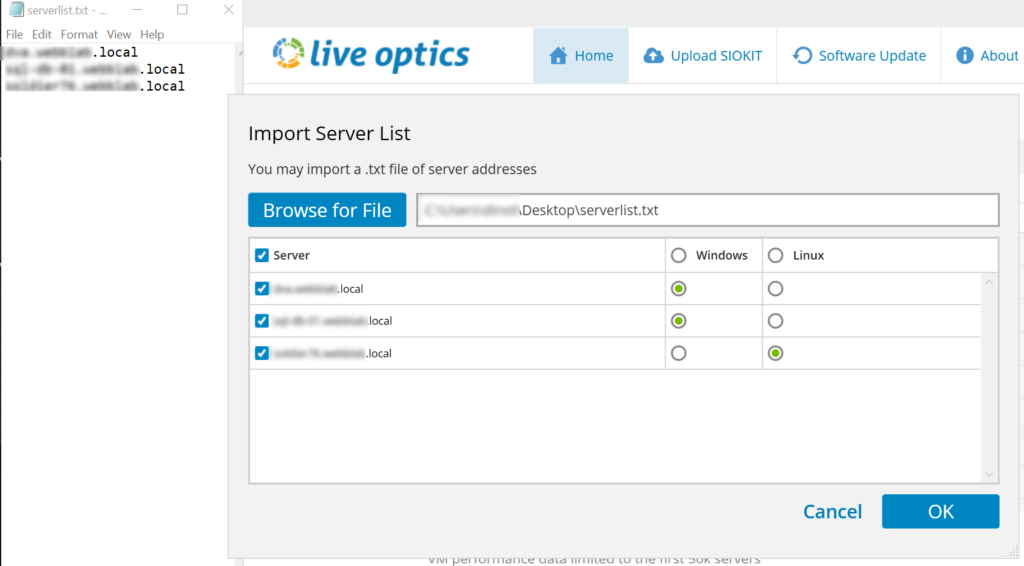
While most environments will only require to add one or more vCenter servers, you may also have a collection of other hypervisor or bare-metal systems you need to monitor. Live Optics makes this easy! All we need to do is create a .txt file with a list of our servers on each line. This can easily be exported from your DNS system. I’m going to bulk add Linux and Windows systems to this same collector run.
Now we are ready to kick off the collector. Finish by selecting the length of time you want to collect and then “Start.”
Wrap it Up!
Live Optics is another great tool in the IT ecosystem to utilize for your next project. Having a performance tool that aggregates multiple performance statistics of your infrastructure helps you develop criteria and requirements for your specific needs.