
One of the exciting parts of joining Pure was getting back to a full-featured storage product with snapshots. I know to some that sounds about as thrilling as hold music on a customer service line. But as someone with a history in storage, I went through a period where I covered products that were seriously lacking modern snapshot capabilities. So, when a customer asked a great question about how to clone a VM off a snapshot on vVols, I was genuinely excited to get into the lab and figure it out. You’ll also be relieved to hear that this will be a short post, which is a rare occurrence for me – like finding a perfectly organized server room!
Cloning operations can have a myriad of use cases. Therefore, it’s important to note that my approach might not meet your specific needs. However, the primary question was this: “I’d like to move to vVols, but how would I clone a new, independent VM from a snapshot of an existing VM?” While I’ve used Storage Policy Based Management in the past, I haven’t covered vVols in depth. So, I couldn’t answer that question off the cuff and needed to dive in. One of the most crucial aspects of vVols is that your storage operations are moved from the storage GUI (in our example, Purity) and into vCenter. In general, an important rule of thumb is that you should always perform your operations in vCenter for vVols. Failure to do so could risk metadata not being created for certain objects, which could break your VMs.
So, I knew you could revert to a snapshot, and you can add a disk from another snapshot, but there isn’t a direct “clone from snapshot” workflow. So, how do we figure this out?
Let’s start with my VM on a vVol. I have a small Ubuntu VM running an “app” (if you can even call it that.) It’s running a small shell script that creates a log file every 10 minutes with the date and time. For clarity, here’s the shell script I’m running:
#!/bin/bash

log_directory="$HOME/logs/snap_time_app"  # Define the directory to store the logs

# Create the log directory if it doesn't exist
mkdir -p "$log_directory"

while true; do
  current_datetime=$(date "+%Y-%m-%d %H:%M:%S")
  log_file="$log_directory/$(date '+%Y-%m-%d').log"

  echo "$current_datetime - Log entry" >> "$log_file"

  sleep 600  # Sleep for 600 seconds (10 minutes)
done
Here’s the directory and file it creates, allowing us to see timestamps over time:

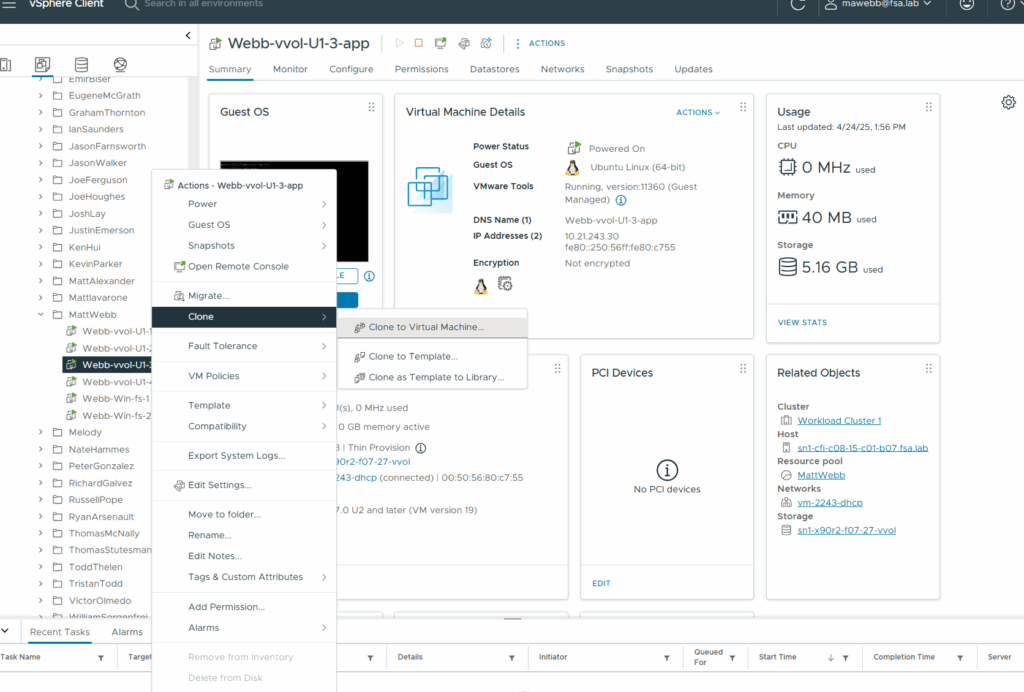
To accomplish the cloning task from a specific point in time, I need to start by cloning the VM via a typical vCenter “Clone to Virtual Machine” operation.
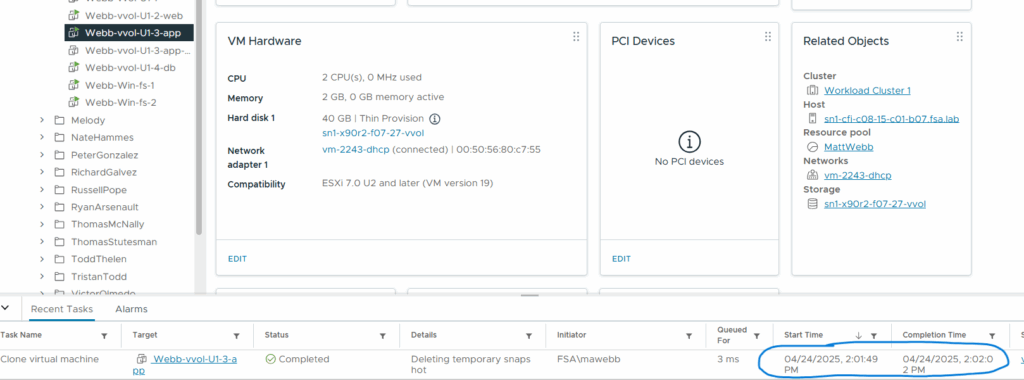
Look at that speed! Having an XCOPY array is nice. I would have waited far longer on a different product I covered!
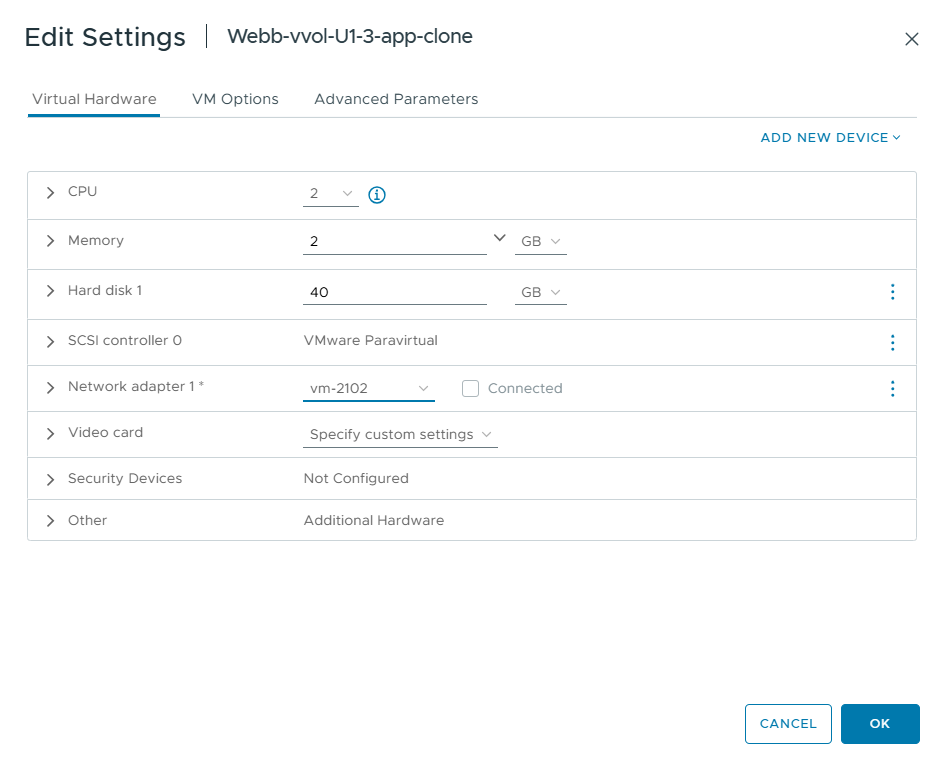
Now, let’s change this new cloned VM to a “dev” network.
Then, let’s add a disk from a snapshot.
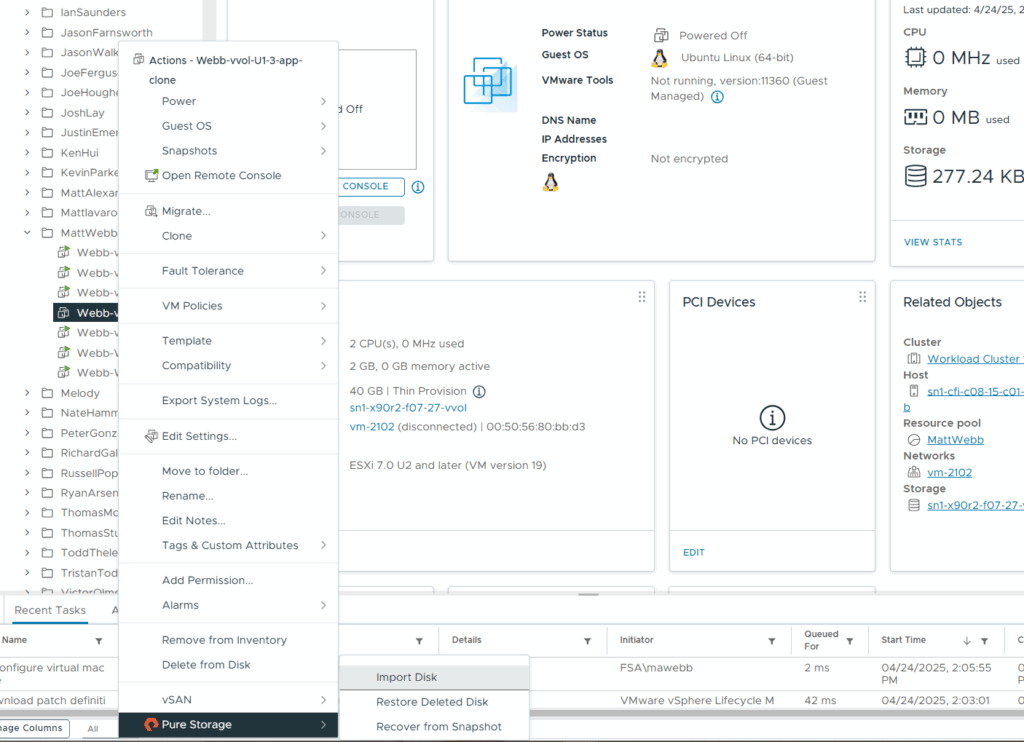
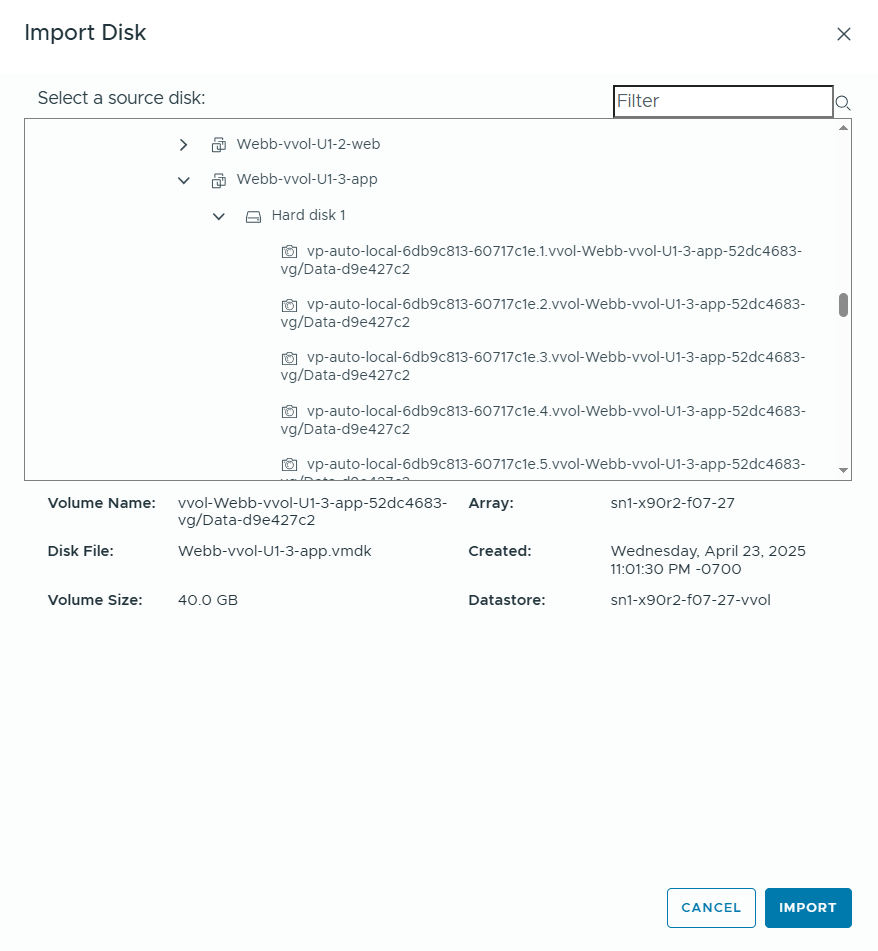
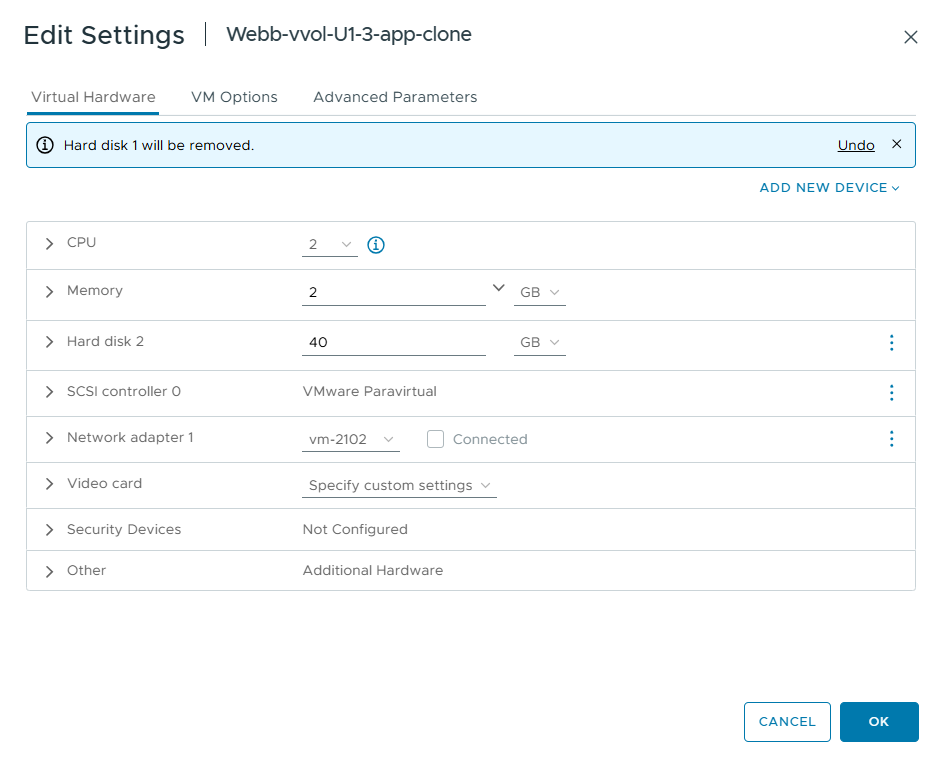
Notice that I’m choosing a snapshot from the previous day. Keep in mind that this is my local PST time, and the shell script is printing UTC time. Now that I’ve selected the snapshot and added that disk to the new VM, I need to remove the original cloned VM vDisk so that only the snapshot disk remains.
Now, I’ll boot up the VM and show the file.
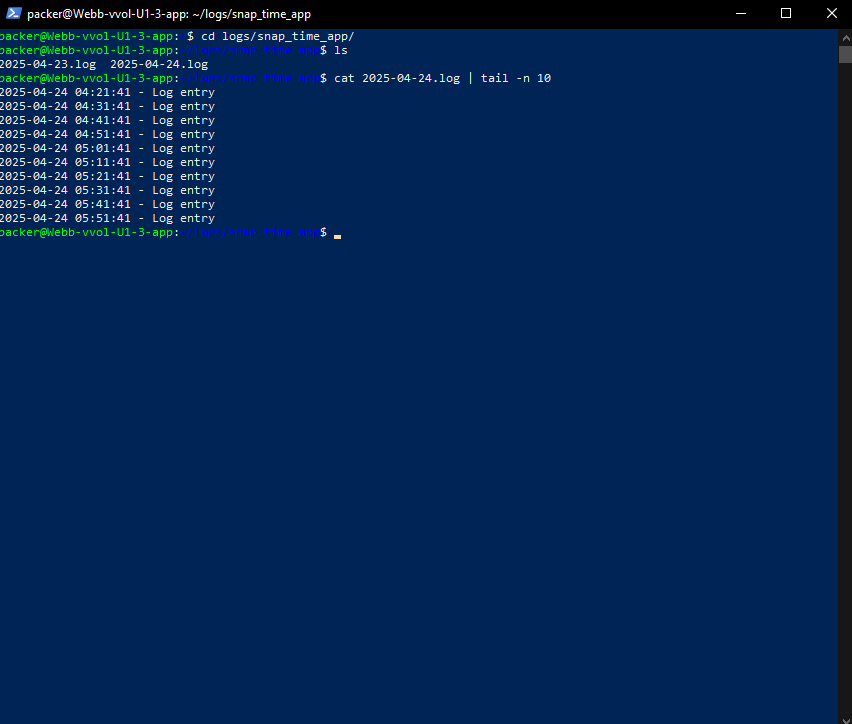
We can see that we now have an independent VM with its previous state restored via a snapshot.
Some things I still need to test: I don’t yet know the dependency on the parent object. So, next week, I’ll do a similar test to ensure that this cloned VM can run without its parent VM. I hope someone found this useful, and please reach out to me on LinkedIn if you have any comments or questions!